Integrating MuleSoft with Slack: A Step-by-Step Guide
Introduction
we'll walk through the process of sending a message to Slack from a Mule application using the Slack Connector. You'll learn how to easily create an app in the Slack API console. Lastly, in Anypoint Studio, you'll create a simple flow that sends a canned message to a channel in Slack.
What you'll need
Anypoint Studio 7.x
Slack Connector
Slack Workspace
Set Up a Slack App
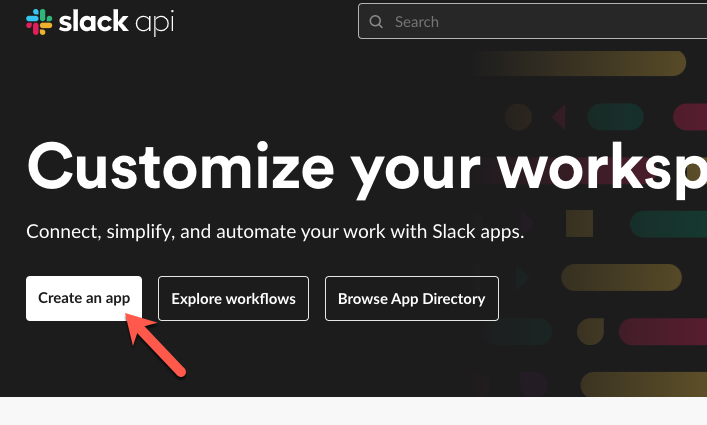
Before we can send a message to Slack from MuleSoft, we need to create a Slack App. Navigate to https://api.slack.com and click on Create App
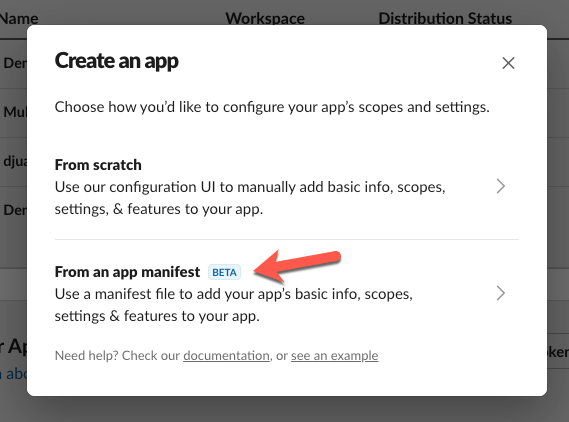
In the next screen, click on From an app manifest
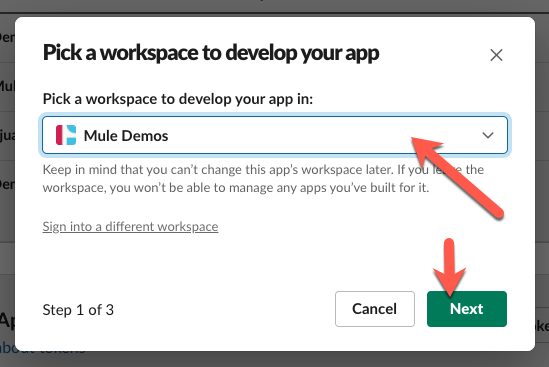
Select the workspace you want to publish the app to and click on Next.
In the next step, paste the following over the default app manifest:
display_information: name: Codelab Demo App features: bot_user: display_name: Codelab Demo App always_online: true oauth_config: redirect_urls: - https://localhost:8082/callback - https://0.0.0.0:8082/callback - https://127.0.0.1:8082/callback scopes: bot: - chat:write - channels:read - incoming-webhook settings: org_deploy_enabled: false socket_mode_enabled: false token_rotation_enabled: false
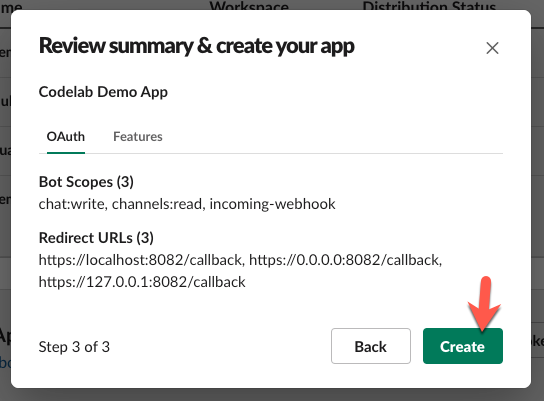
It should look like the screenshot below before you click on Next

In the last step, click on Create
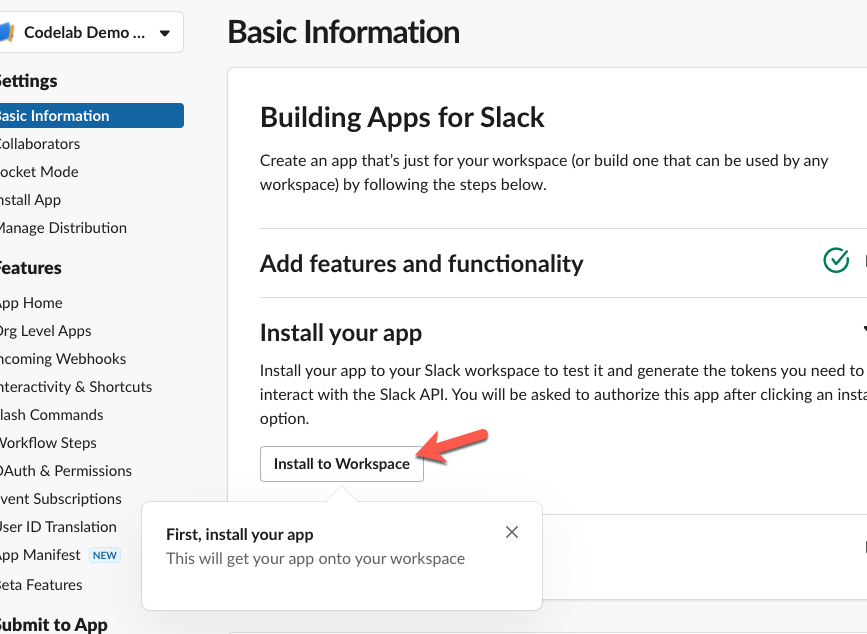
Before we can use the Slack App, we need to install it into a Workspace. Click on Install to Workspace.
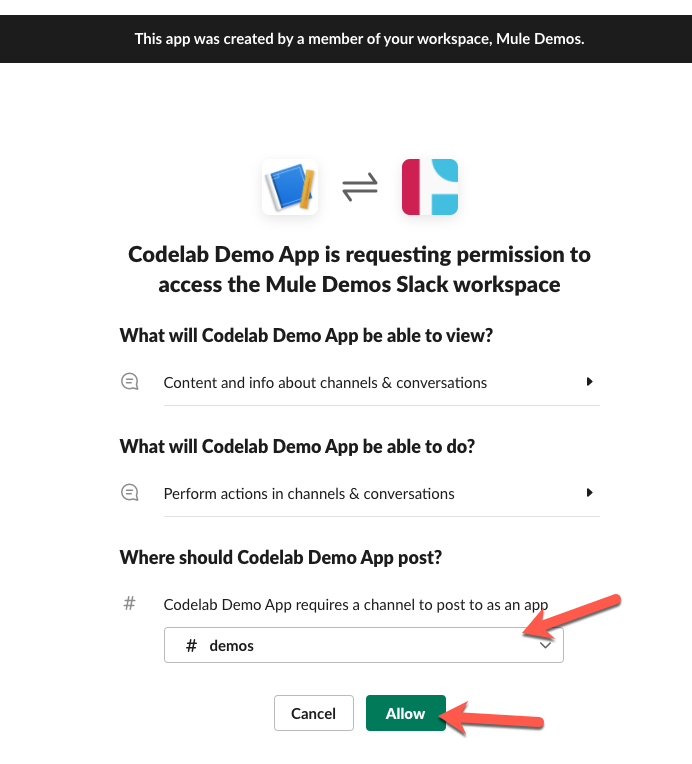
Select a channel to allow the app to post to by default and click on Allow.
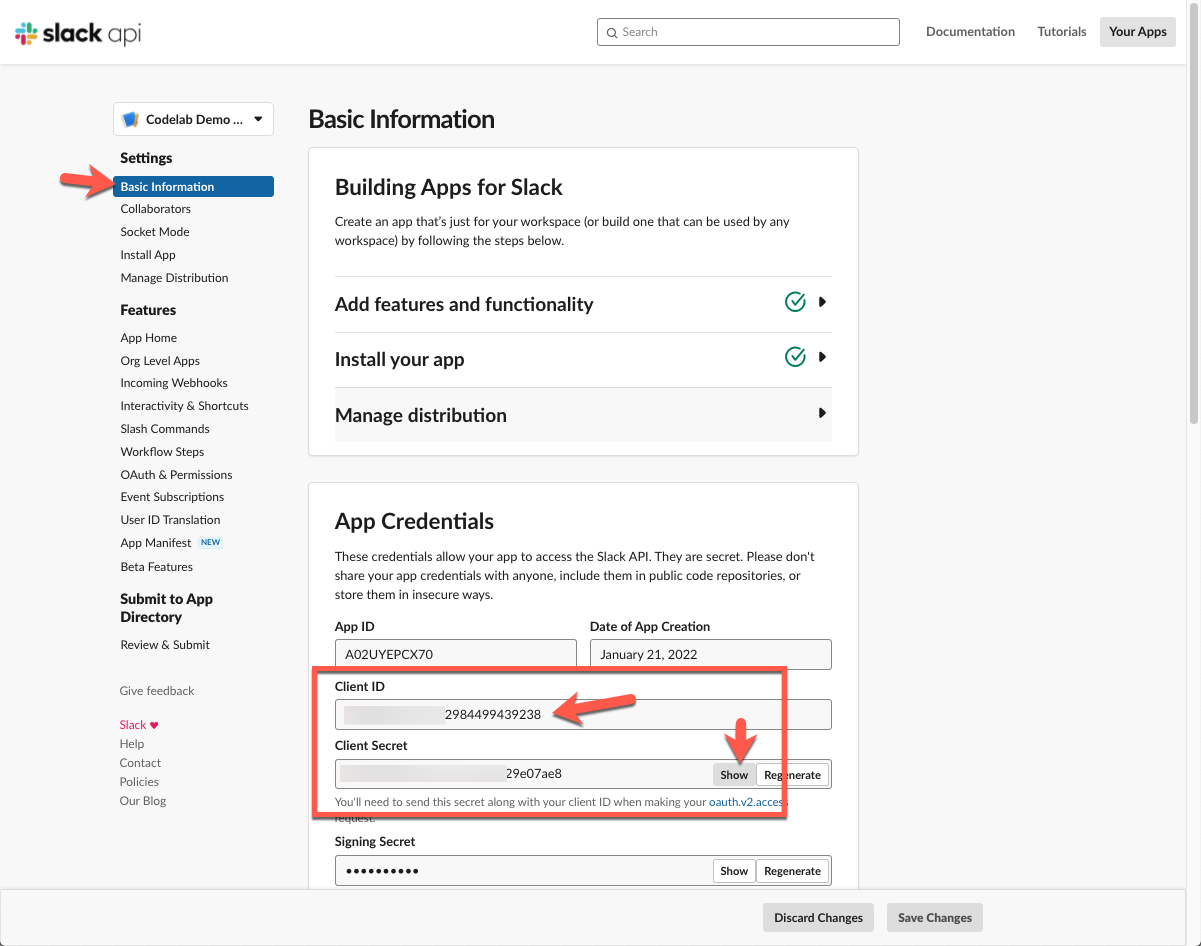
You'll return back to the Basic Information section of your newly created app. In the App Credentials section, you'll want to copy down the Client ID and Client Secret. We'll need these to configure the Slack Connector in Studio later.
Ok, keep the window open for now if you didn't copy the Client ID and Client Secret down and switch to Anypoint Studio to create the Mule application.
Add Slack Connector
Search for Slack and select the Slack Connector - Mule 4. Click on Add and then click on Finish. Be sure to select the connector that doesn't have Community in the name.
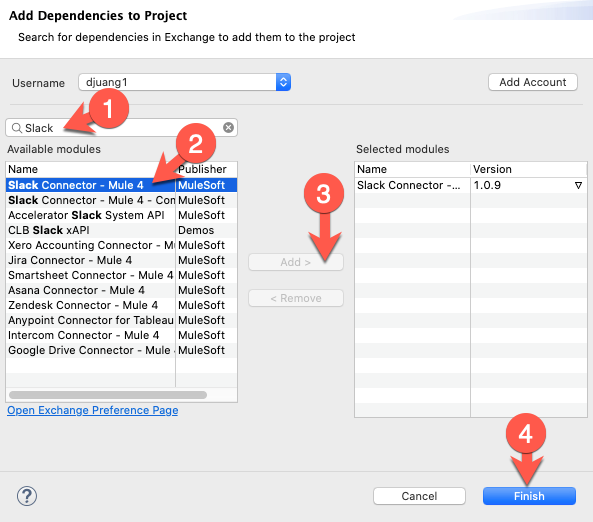
Additionally you can add the module as a dependency to your pom.xml file
<dependency> <groupId>com.mulesoft.connectors</groupId> <artifactId>mule4-slack-connector</artifactId> <version>1.0.9</version> <classifier>mule-plugin</classifier> </dependency>
Create Flow
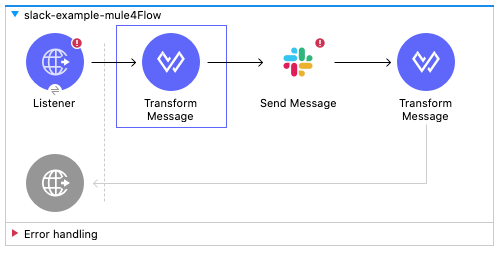
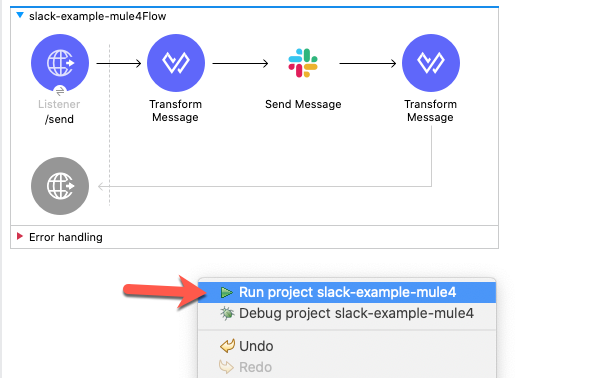
From the Mule Palette, drag and drop the following components to match the flow below. You'll need the HTTP > Listener, Transform Message, Slack > Send Message, and the Transform Message components. We'll go back and configure everything later.
Configure HTTP Listener Configuration
Generate a Self-Signed Certificate
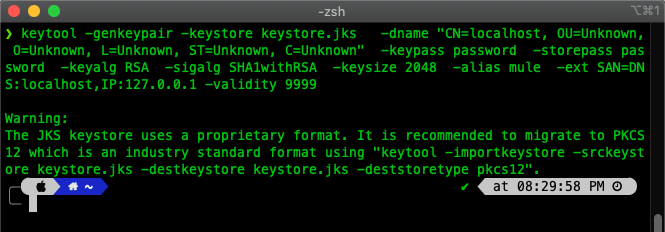
Before you set up the HTTP Listener, you need to create a keystore.jks file. Open a terminal window and paste and run the following command:
keytool -genkeypair -keystore keystore.jks -dname "CN=localhost, OU=Unknown, O=Unknown, L=Unknown, ST=Unknown, C=Unknown" -keypass password -storepass password -keyalg RSA -sigalg SHA1withRSA -keysize 2048 -alias mule -ext SAN=DNS:localhost,IP:127.0.0.1 -validity 9999
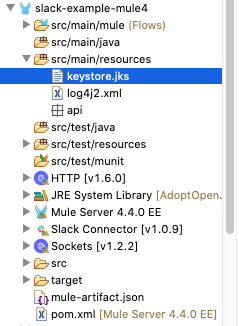
Navigate to the folder where you generated that keystore file and copy and paste it into the src/main/resources directory of the Mule project.
Set HTTP Listener Configuration
Now go back and select the HTTP Listener component in the flow we just created. If the Mule Properties tab doesn't open, click the Listener icon and click on the green plus sign to create a new Connector configuration.
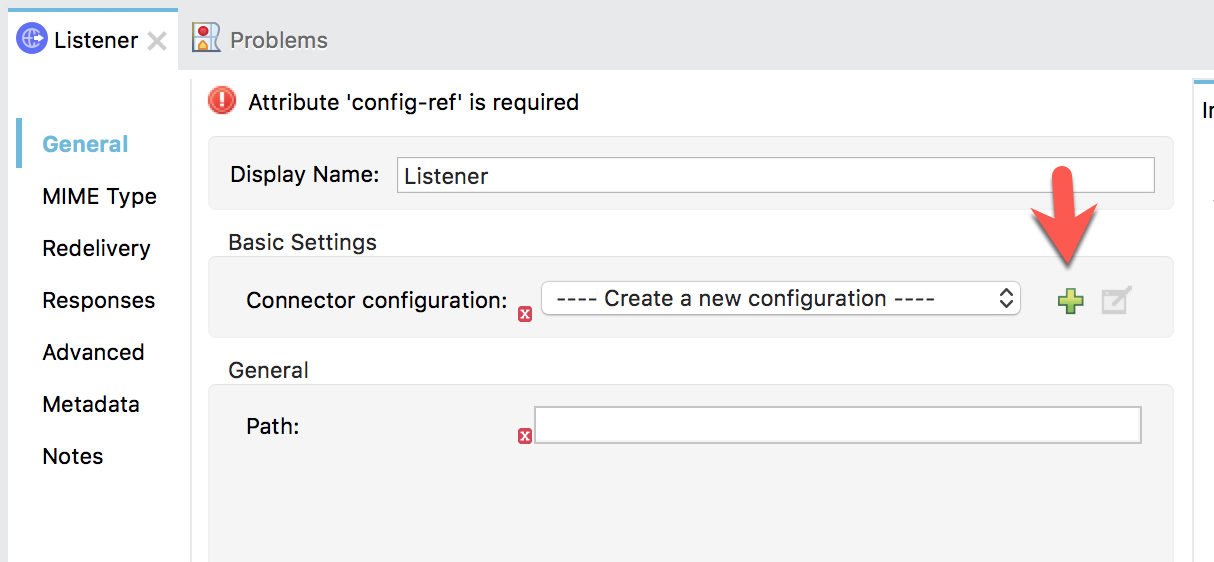
Under the General tab, and in the Connection section, change the Protocol: to HTTPS and then change the Port to 8082.
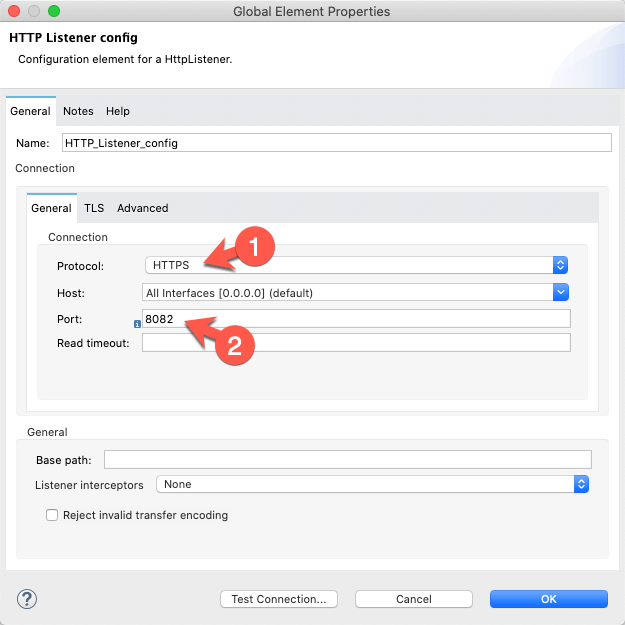
Click on the TLS tab and change the TLS Configuration dropdown to Edit inline
In the Key Store Configuration section, change the Type dropdown to JKS. Fill in the following fields:
| Path | keystore.jks |
| Alias | mule |
| Key Password | password |
| Password | password |
Click OK to close the dialog window and proceed to the next step.
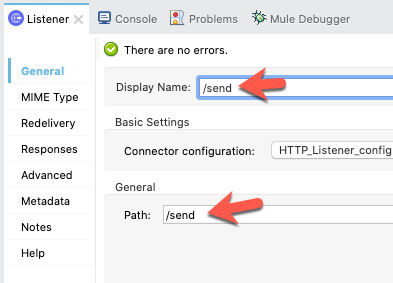
Set Listener Path
Back in the Listener Mule properties tab, fill in the Path field with the value /send. Also fill in the Display Name field with the value /send.
Set Slack Configuration
Select the Send Message component. If the Mule Properties tab doesn't open, click the Send Message icon and click on the green plus sign to create a new Connector configuration.
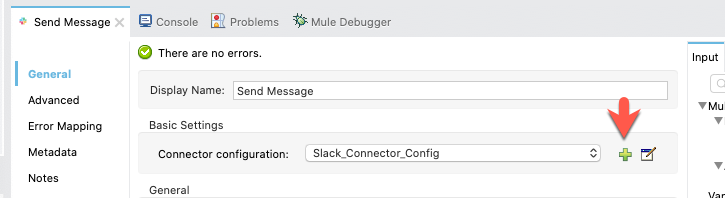
This is where the bulk of the configuration will be for calling the Slack API.
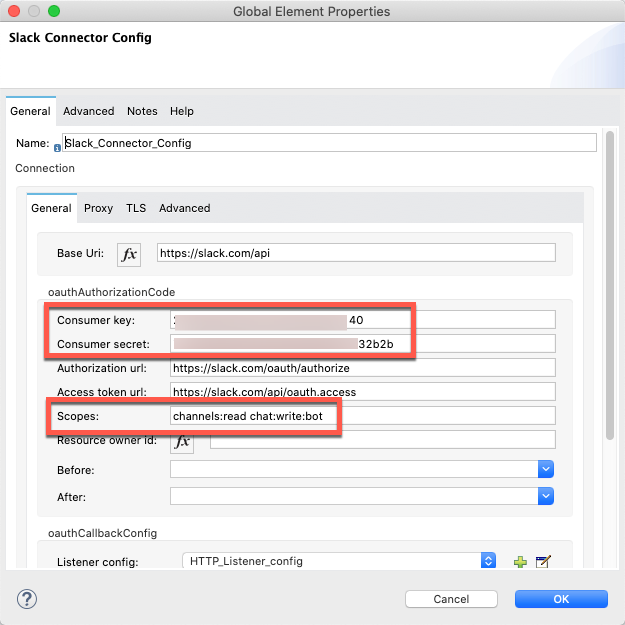
Under the General tab, and in the oauthAuthorizationCode section, fill in the Consumer key: and Consumer secret: field with the Client ID and Client Secret from the previous step from Slack. In the Scopes field, replace the default text with the following:
channels:read chat:write:bot
See the screenshot below to see what it should look like.
Next, scroll down and find the oauthCallbackConfig section. Fill in the Callback path: and Authorize path: fields to match the following screenshot below.
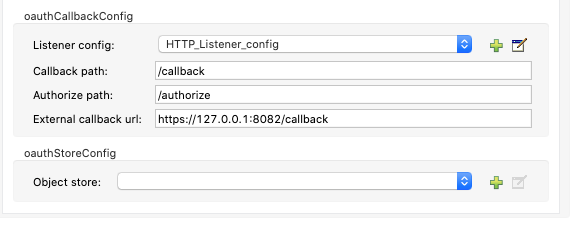
| Callback path: | /callback |
| Authorize path: | /authorize |
| External callback url: | https://127.0.0.1:8082/callback |
Then click on OK to close the screen.
Configure Transform Message - Before
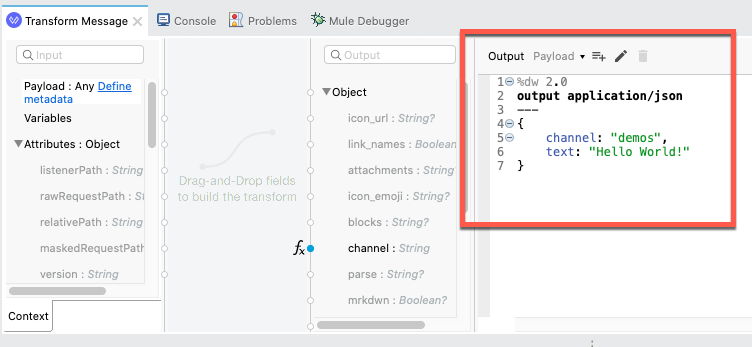
In this component, we're going to create the JSON message that we want to pass to the Send Message component. The message contains the channel that we want to send to the message as well as the message itself. For this lab, we're going to hard code the message (e.g. "Hello World!"). Double click on the Transform Message component and paste the following DataWeave script into the editor.
%dw 2.0 output application/json --- { channel: "demos", text: "Hello World!" }
Run Mule Project
Now that everything has been configured, let's run the project and test the flow. Right-click on the canvas and click on Run project
When the project is successfully deployed, switch to your browser and navigate to the following URL:
https://localhost:8082/authorize
If configured correctly, you'll be redirected to the Slack workspace screen to allow the app access to the workspace.
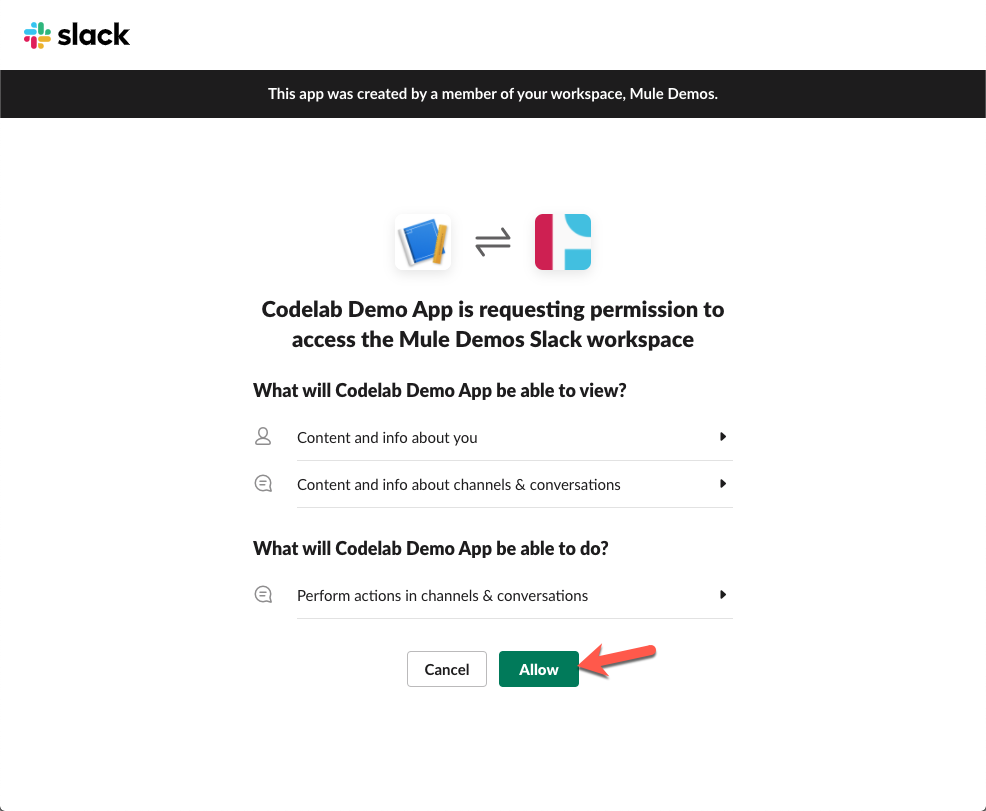
Once you click on Allow, you'll be redirected to this screen:
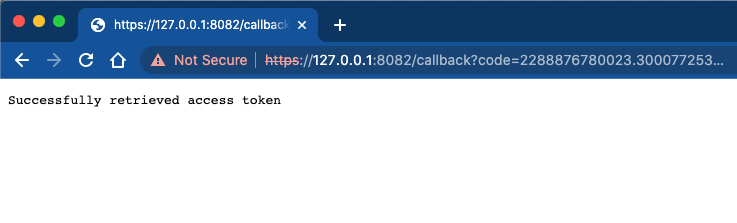
Open a new tab and navigate to the following URL:
https://localhost:8082/send
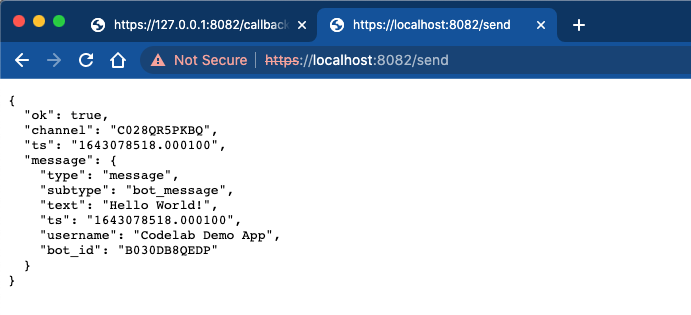
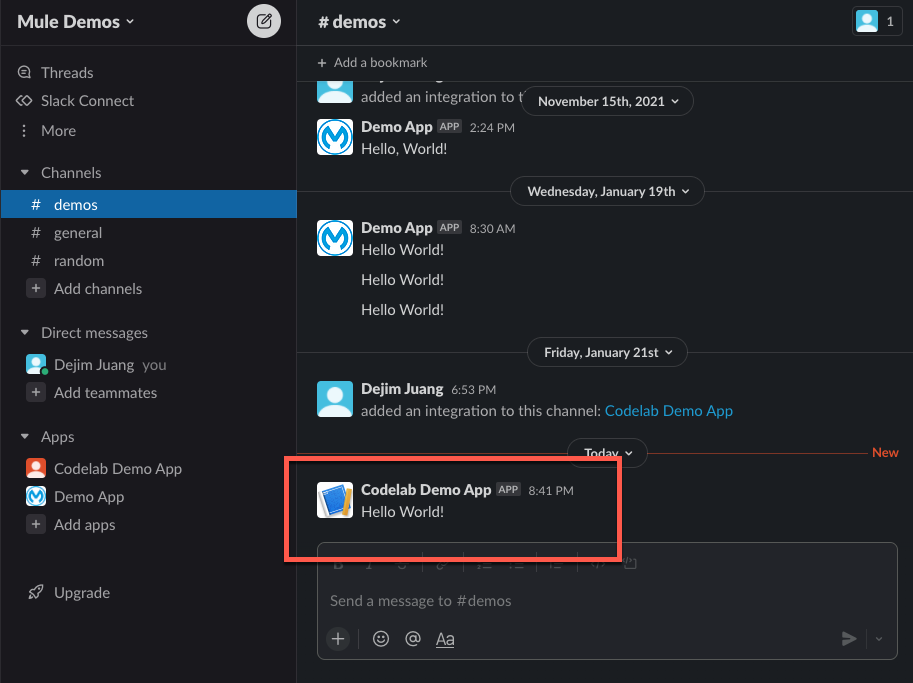
If everything was configured correctly, you should see a response from Slack letting you know that the message was sent successfully. Switch to Slack and navigate to the channel where you configured the application to write the message to and you see the message that we sent.
Conclusion
In this guide, we successfully walked through the process of sending a message to Slack from a Mule application using the Slack Connector. We began by creating a Slack App through the Slack API console, ensuring that we configured the necessary permissions and settings for our application. After setting up the app, we moved to Anypoint Studio, where we integrated the Slack Connector into our Mule project.
We detailed the steps to configure the HTTP Listener, generate a self-signed certificate, and set up the Slack Connector with the appropriate OAuth credentials. By constructing a simple flow that included transforming a message into JSON format, we were able to send a predefined message to a specified Slack channel.
Upon running the Mule project and authorizing the app, we confirmed that the message was successfully sent to Slack, demonstrating the seamless integration between MuleSoft and Slack. This process not only highlights the capabilities of MuleSoft in connecting with external APIs but also showcases the ease of use provided by the Slack Connector. With these foundational steps, you can further expand your Mule applications to include more complex interactions with Slack or other APIs, enhancing your workflow automation and communication strategies.